What Lies Beneath

A well-prepared, strong and solid substrate is the vital element to underpin a successful flooring installation. If the substrate is not properly prepared, the flooring installation can fail.
An early inspection can determine the condition of the substrate and identify the extent and nature of any cracking.
This approach is necessary to decide if issues with cracking and damage can be effectively routed out and treated.
In certain cases, the inspection can also unearth more serious technical structural problems.
Substrate Condition and Strength
During an inspection, the strength and condition of the surface should be established.
Careful attention should be paid to areas including upstands, as well as details such as gullies, drainage outlets and pipe penetrations. All of these are potential problem areas and need to be carefully considered in the process too.
An inspection can also help to pinpoint what the building was used for previously, and what likely contaminants from past use are embedded into the substrate.
This is important work to undertake, as the past uses a building was subjected to can emerge to cause issues in the flooring installation projects. For example, oils, chemicals and other products used over the years could provide a hidden problem, which can be identified in an inspection of the substrate.
Damp Matters
One factor which can cause significant problems is damp. This remains a real danger, which will seriously threaten the success of any flooring installation.
Key to managing the scale of the problem is to take hygrometer readings at intervals across the work area, to identify moisture levels.
Bear in mind that there is a strong possibility that properties dating from before the 1970s may have been built without a proper damp proof membrane (DPM) under the subfloor itself or that any that were laid are failing or have since failed.
Where serious doubt about the existence of an adequate DPM persists, even where hygrometer readings are 75% Relative Humidity, then the installation of a well proven, fluid applied Surface Damp Proof Membrane is definitely needed.
Managing Excess Moisture
Moisture in floors generally comes from one of two sources when the building is watertight.
The first is related to new build projects, where there can be constructional moisture contained within the newly installed sub floor.
The second scenario is where there is no DPM within the subfloor construction or it is deemed ineffective. This may be due to it having degraded or expired over time. This situation is usually encountered in older buildings.
In existing buildings, it will be the ground floor which will be affected by excess moisture.
In the case of moisture on a new build project, there is a chance that excess moisture can also affect the building’s upper floors as well as the ground floor.
Firstly, some research work is needed beforehand to establish the situation. This can be done by taking moisture readings as a starting point. There are various methods of testing and Tremco CPG can advise on the best way to achieve an accurate result.
Once readings have been taken, you can then decide what the next steps should be.
If it is found that readings are over 75% relative humidity, then the question can be asked - does the sub floor need an epoxy surface DPM or moisture vapour suppressant?
Traditionally, an epoxy surface DPM, such as TREMCO ES100, has been used where readings are up to 97.9% relative humidity (theoretically 99.9%).
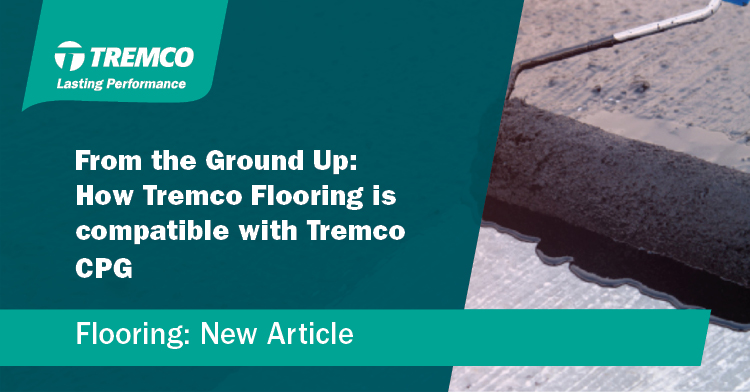
Before this can be applied it is vital that the sub floor is surface dry, even and contaminant free. If the surface is not even, pre-smoothing of the subfloor is recommended. This will achieve two things, one, the effectiveness of the surface DPM and two, the correct coverage rate of the surface damp proof membrane.
If the above is achieved, the epoxy DPM can be applied directly to the sub floor followed by a primer and then the smoothing compound. The selected floor covering is then adhered with a suitable Tremco flooring adhesive.
It’s worth noting that some Tremco smoothing compounds can be applied directly to the Tremco DPM without the requirement of a primer, however, we would strongly advise Installers to always contact the manufacturer for further guidance on this.
New Build Considerations
When readings are up to 95% relative humidity on a new build project, and there is an effective DPM installed under the sub floor, a moisture vapour suppressant can be used, such as Tremco ES600.
Once the sub floor is surface dry, even and contaminant free, two coats of ES600 should be applied. When the first coat is fully cured, a second coat is applied at right angles to the first and allowed to dry.
When the second coat is fully cured (usually 1 hour), a suitable Tremco smoothing compound should be applied, followed by the recommended adhesive for the floor covering, completing the project.
Prime Position
When considering primers, Dry substrates may vary in porosity and require priming to prevent any pinholing from occurring.
Self-levelling floor finishes will adhere well on their own, but a primer can still be essential to stop this.
This is an important consideration, as otherwise air in the substrate may rise through the self-leveller and cause air bubbles.
A screed or mortar topping will need a primer to ensure a good bond with the substrate, the exception being some water-based polyurethane screeds, which can be applied to cementitious substrates (concrete or screed) without a primer.
Products such as Isocrete Primer, an acrylic, emulsion-based primer for Isocrete cement-based self-levelling screeds, can be used to prime concrete and screed subfloors, as well as impermeable surfaces, prior to the screed application.
It improves adhesion to the substrate, reduces surface absorbency and prevents air bubbles migrating to the surface.
The Final Stages
One final point, when conducting all stages of the inspection, specification and installation, it is essential for the flooring specialist to remain mindful of the building's eventual function, to ensure it is fit for purpose for the future.
Occupancy also needs to be considered in relation to the products and methodology chosen. It may, for instance, be appropriate to choose products offering very low odour or that are EC1 compliant to respect locations like hospitals or food production facilities.
In summary, some detective work is often required to ensure a flooring installation gets off to the best possible start.
In all situations, correct preparation remains essential to success and, in this important area, manufacturers are on hand to help contractors achieve the right outcome.
For more detailed information and best practice, the British Standards, BS8203:2017 Code of Practice for the Installation of Resilient Floor Coverings is an excellent reference.
Contact us today for more information.


